Set Global Edit Mode to Gate ⌃⌥G
Sets the edit mode for all of the rows. Just like selecting ‘Gate’ from the menu bar control.
I really need to re-think my idea of step sequencing. Programming a sequencer using visual tools sparks lots of ideas.
Use Step Sequencer edit modes in Logic Pro — Apple Support
Gate: Drag vertically in the step to set the Gate value as a percentage of the step. The Gate value shortens the note length to less than the duration of the step.
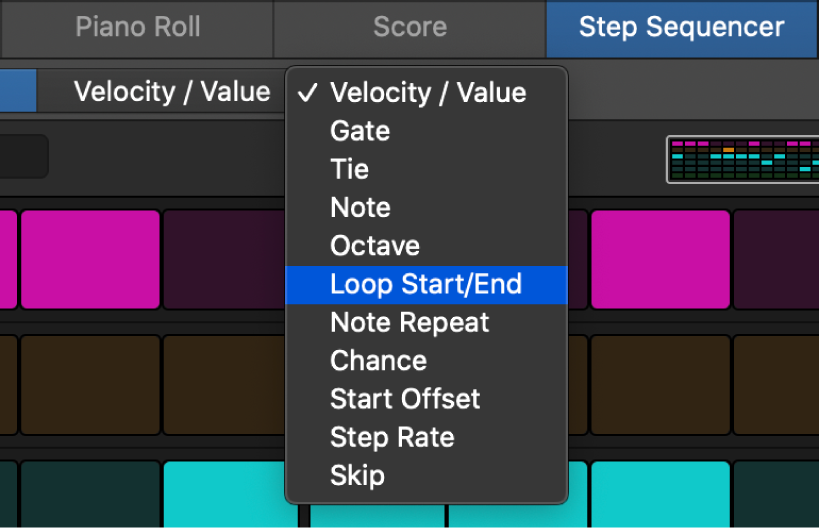
Use Step Sequencer edit modes in Logic Pro — Apple Support
The Edit Mode selector in the Step Sequencer menu bar controls the edit mode for all rows in the pattern. Step On/Off mode is always available on the left-side button on the selector. You can choose other edit modes from the menu on the right side of the selector. The chosen edit mode appears on the right-side button. Edit modes include the following: