•Increase Last Clicked Parameter by 1 = — Logic Pro X keyboard command of the day

Logic Pro X keyboard command of the day. #LogicProX @StudioIntern1

  •Increase Last Clicked Parameter by 1  =

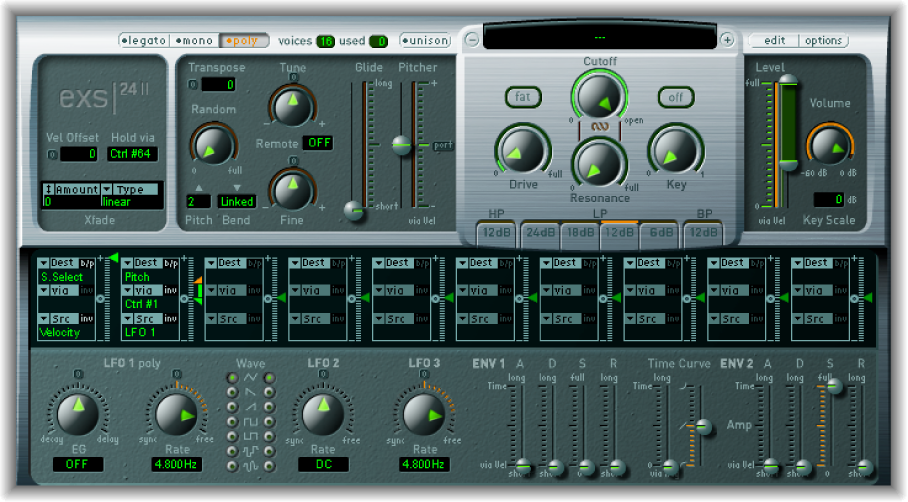
This is very handy, and a complete surprise to anyone who started using Logic with Logic Pro X. I still haven’t figured out why there is a bullet character at the front of the command, but whatever…these would make great commands for the Touch Bar.

Logic Pro 9 User Manual: Basic Operations

There are a number of techniques to choose from when making selections and editing items in Logic Pro. In this chapter, you’ll learn about basic operating, selection, and editing techniques, as well as a number of shortcuts and features that help to accelerate your workflow.

⇧ SHIFT – ⌃ CONTROL – ⌥ OPTION – ⌘ COMMAND

Command    Key Touch Bar
- Various Windows
•Increase Last Clicked Parameter by 1 =
•Decrease Last Clicked Parameter by 1 -
•Increase Last Clicked Parameter by 10 ⇧=
•Decrease Last Clicked Parameter by 10 ⇧-

Crop Regions outside Locators or Marquee Selection ⌘\ ⌘3⃣ — Logic Pro X keyboard command of the day

Logic Pro X keyboard command of the day. #LogicProX @StudioIntern1

  Crop Regions outside Locators or Marquee Selection ⌘\  ⌘3⃣

undocumented command. There are many fine points about regions and how to work with them. They are only documented in the Logic Pro 9 manuals. Time to read Chapter 13 of the Logic Pro 9 manual.

Logic Pro 9 User Manual: Selecting Regions

This action removes all unselected areas from regions which are partly marquee-selected.

Logic Pro 9 User Manual: Creating Your Arrangement

Once you have added your audio and MIDI regions to the Arrange area, you can edit and reorganize them to create an overall arrangement, or project. Most arranging and editing techniques work identically for both audio and MIDI regions. Apple Loops are also handled in a similar fashion. Where handling differs, variations are pointed out in the appropriate sections of this chapter. Note that all operations described with a pluralized heading (regions, for example), apply to one or more selected region(s).

⇧ SHIFT – ⌃ CONTROL – ⌥ OPTION – ⌘ COMMAND

Cycle Through Window Views ⇥ — Logic Pro X keyboard command of the day

Logic Pro X keyboard command of the day. #LogicProX @StudioIntern1

  Cycle Through Window Views    ⇥

Only in the main window. The TAB key. Changes the focus between the various areas in a window. Movement is clockwise. In the main window you get Tracks, Lists, Mixer, and back to Tracks. Shift-TAB reverses the order, counter-clockwise.

Logic Pro 9 User Manual: Understanding the Window Types

The Arrange window can incorporate several other windows in different areas. These can be given key focus by clicking the background or title bar of the window (the area of the Arrange window you want to use), or by using a tool in the window.

Tip: You can also use Tab or Shift-Tab to cycle through the Arrange window areas: Tab cycles forward, Shift-Tab cycles backward.

The main characteristic of the key focus window (or area of the Arrange window) is that key commands only affect this window, and not any of the others.

Open and close windows — Logic Pro X

Only one window can have key focus at a given time, this is called the active window. When several normal windows overlap, the active window is the window in the foreground. The title of the window with key focus is black (the titles of other open windows are gray). Inside a window, the area with key focus (for example, the Tracks area) is bordered by a blue frame.

⇧ SHIFT – ⌃ CONTROL – ⌥ OPTION – ⌘ COMMAND

Delete Unused Groups — Logic Pro X keyboard command of the day

Logic Pro X keyboard command of the day. #LogicProX @StudioIntern1

  Delete Unused Groups

This command is used with the EXS24 sampler. Another casualty of the slashing of documentation in the change from Logic Pro 9 to Logic Pro X.

Wildly unfortunate — if you use the command-/ keypress to get further help on the command (as suggested in the Key Commands window) you get directed to the “Groups” section of the help system. Mixer Groups are definitely not what is going on here. Miles away. Mis-direction.

Logic Pro 9 Instruments: Creating EXS24 mkII Instruments, Zones, and Groups

Choose Group > Delete Unused Groups in the Instrument Editor.

EXS24 mkII overview — Logic Pro X

EXS24 mkII is a software sampler. It plays back audio files, called samples, that you load into it. These samples are combined into tuned, organized collections called sampler instruments. Because sampler instruments are based on audio recordings, they are ideally suited to emulating real instruments such as guitars, pianos, and drums.

⇧ SHIFT – ⌃ CONTROL – ⌥ OPTION – ⌘ COMMAND

Zoom to fit Selection vertically, store Navigation Snapshot — Logic Pro X keyboard command of the day

Logic Pro X keyboard command of the day. #LogicProX @StudioIntern1

  Zoom to fit Selection vertically, store Navigation Snapshot

Most of the zoom and store commands are not mapped. It is a simple matter to adjust the zoom and use the Store Navigation Snapshot command.

I strongly recommend that you read the Logic Pro 9 manual introductory material to gain a proper understanding of what the tool can do. The commands and workflow are all there in Logic Pro X, but the description and discussion of things like Zoom were yanked from the Logic Pro X manual. Did the bits weigh too much for shipping?

Zoom windows — Logic Pro X

You can store three different zoom settings for each window using the Save as Zoom 1–3 key commands. Use the Recall Zoom 1–3 key commands to recall your zoomed settings. These commands only apply to the active window or window area.

Logic Pro 9 User Manual: Zooming the Working Area

You can set, and recall, up to 30 zoom level and scroll bar positions for each window. These allow you to navigate through a number of window zoom levels and scroll bar positions, making repetitive editing tasks much faster.

⇧ SHIFT – ⌃ CONTROL – ⌥ OPTION – ⌘ COMMAND

 
Command    Key Touch Bar
- Various Windows
Zoom to fit Selection vertically and horizontally, store Navigation Snapshot ⌃⇧Z
Zoom to fit Selection horizontally, store Navigation Snapshot
Zoom to fit Selection vertically, store Navigation Snapshot
Zoom to fit Locators, store Navigation Snapshot
Zoom to fit All Contents, store Navigation Snapshot
Store Navigation Snapshot ⇧Z
Navigation: Back ⌥Z
Navigation: Forward ⌥⇧Z