The Marquee Tool — Logic Pro X

#LogicProX @logicproexpert @vandeviper

I keep trying to use the marquee tool to make things easier. I keep forgetting.

Watched this video — 6 Reasons to Use the Marquee Tool — made some notes.

My notes follow — better to read the article that accompanies the video.

2018-12-21 — watch

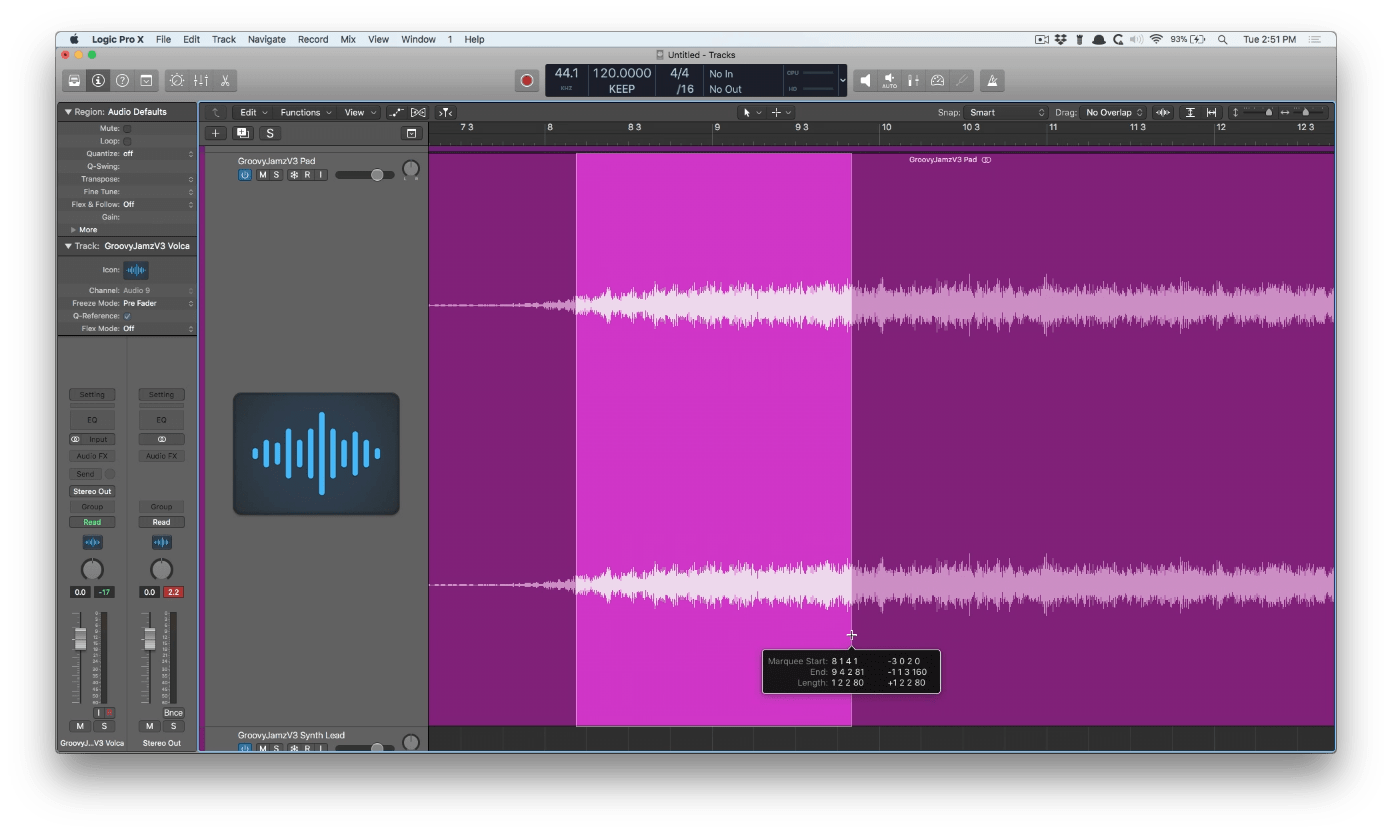
Make selection of region or file

Marquee at bottom of region — Set Marquee tool for command-click

Use to remove chunks of empty space as opposed to Strip Silence — highlight, press DEL

Split Region — double click on region at proper location for split

Select region and press play!

Create new track, highlight region, option-drag to new track

Click on automation line gives 4 nodes for simple drag

Selection-based processing — use marquee as opposed to ‘Split Region’ (cmd-T) on either end of the section of the region

Save as Template… Logic Pro X keyboard command of the day

Logic Pro X keyboard command of the day. #LogicProX

I use this command a fair bit. I tweak my template when I learn new methods or choose a new primary tool. No need to map it to a keyboard command, but it’s good to know where it is in the File menu.

My template editing consists of creating a new project from the template, making changes, then doing a save as template using the original name (click on the template file name in the mini-Finder to get it filled in) and over-writing it.

Multiple busses. Multiple sends for monitor mixes.

WindowImage

Multi-Bus Template

Logic Pro X — EFFECTS SENDS — Post Pan, Post Fader, Pre Fader, Sends on Faders, Independent Pan — YouTube:

Logic Pro X — EFFECTS SENDS — Post Pan, Post Fader, Pre Fader, Sends on Faders, Independent Pan

For today’s work I reinforced my understanding of sends, faders, panning, and such for Logic.

Modified the multi-bus template to add HP1 and HP2 to bus labels for in-ear/monitor mixing.

I am reminded that Outputs (sends) are assigned to busses. Logic creates AUX channels (with strips) as destination for the busses. Keeping this distinction in mind helps understanding the audio path.

MusicProductionTips (@MgntcSound) | Twitter

MusicProductionTips (@MgntcSound) | Twitter:

Vocal contrast: give the vocals a 1⁄4 note or an 1/8 note delay. When the chorus hits, change it to a 1⁄2 note delay and turn up the feedback a little bit. The vocal will have more depth in the chorus. Back off the high end with an EQ to create depth without the obvious echos.

These are handy tips. I like them. I keep them in a collection on the twitter…