Not Many Audio Professionals Know This Fact About Mixing On Headphones

Production Expert | Not Many Audio Professionals Know This Fact About Mixing On Headphones:

When listening to music over stereo speakers we experience crosstalk between the left and right channels. This introduces time of arrival differences between the channels as well as spectral masking introduced by our heads. None of these are present when we listen on headphones. All we are left with is the level differences between the two channels of the stereo signal. What we hear over headphones is closer to binaural. This is why music sounds different on headphones and why mixing on headphones remains controversial.

I have to admit headphones just sound different to me. Hard to build a proper image.

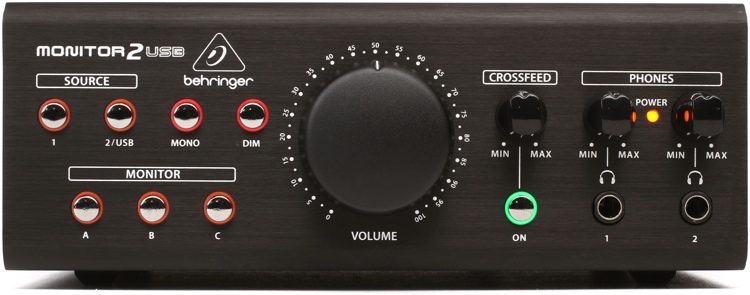
I added a Behringer MONITOR2USB to the studio some time back…easy to control sources (I have 3) and outputs (I have 3). A pair of headphone jacks are included as well. Independent volume control on each headphones. There’s also a nifty crossfeed function…from the manual

CROSSFEED control blends the left and right headphone channels to simulate the characteristic stereo panorama produced by monitor speakers in an open acoustic space. In an open room, the sound from each monitor speaker enters both ears and gives the brain additional timing information about the sound, which then affects the listener’s perception of the stereo field.In contrast, headphones feed each ear a starkly separated stereo channel, with no crossover to the opposite ear.This lack of crossover can cause mixes to sound very different on headphones, as well as being a more fatiguing listening experience. By using the CROSSFEED function, you can more closely simulate the stereo sound of monitors while mixing on headphones, which means your headphone mixes will more closely match the mixes you produce on monitors, and you will experience less ear fatigue from long sessions wearing headphones.

The MONITOR2USB ($150) is essentially a clone of an SPL 2Control ($900). Whenever I mix with headphones I run the sound through Sonarworks Reference 4, and turn on the crossfeed function.

How to Choose a Reverb for Music Production

How to Choose a Reverb for Music Production:

But before we begin, one caveat: there is no such thing as a bad reverb. One reverb may work incredibly well on one instrument while sounding disastrously bad on another. And furthermore, the same reverb may sound great on a guitar on one song, and create a very muddy mix on the same guitar on another song. Making the decision as to which reverb to select is personal. This guide is meant to be an idea-sparking tool to help you in the process.

Always good to share…

Set All Tracks to Automation Off ⌃⇧⌘O — Logic Pro X keyboard command of the day

Logic Pro X keyboard command of the day. #LogicProX @StudioIntern1

  Set All Tracks to Automation Off    ⌃⇧⌘O

Along with the ability to set all tracks O(ff) you can use R(ead), T(ouch), L(atch), and Write (this one is not mapped).

When it comes to automation volume/level I am far more likely to use region gain to adjust levels before I automate. That’s part of the skill/art that I need to work on. We get past the mechanics of doing the automation (and how it works) and concentrate on why it might be artful.

Many things come to mind. Time to post and continue.

Automation overview — Logic Pro X:

Automation refers to recording, editing, and playing back the movements of faders, knobs, and switches. Using automation, you can create changes over time to volume, pan, and other settings. You can add automation to all track types.

⇧ SHIFT – ⌃ CONTROL – ⌥ OPTION – ⌘ COMMAND

Gain Staging in Logic Pro — What Is It, & Does It Even Matter?

Gain Staging in Logic Pro — What Is It, & Does It Even Matter?:

There are few things that strike so much fear or disdain for Logic users than the word gain staging.

I am a firm believer in gain staging. I did it a lot setting up for recording live from a Mackie mixer. The band thought the proper way to control volume was to adjust the trim pots, never mind the faders on the board. I tried to do it every time, but that wasn’t always easy. It was the same room almost always, so the pictures I took of the mixer helped a lot.

Did the sound change when properly gain-staged? Absolutely.

Show/Hide All Inactive Track Alternatives — Logic Pro X keyboard command of the day

Logic Pro X keyboard command of the day. #LogicProX @StudioIntern1

  Show/Hide All Inactive Track Alternatives

Track alternatives are new to me. When mixing I normally want to change channel strip settings, not the actual music. I recognize the benefits of comping, but I don’t record multiple takes and then work with the better pieces of each.

I need to remember track alternatives. I think they will come in handy when I collaborate with other Logic users.

Use track alternatives — Logic Pro X:

You can create and edit track alternatives and switch between them. Each alternative can contain different regions or arrangements, while sharing the same channel strip and plug-ins. Track alternatives are like “playlists” for individual tracks that can be used to try out different ideas or archive tracks at different stages of development.

⇧ SHIFT – ⌃ CONTROL – ⌥ OPTION – ⌘ COMMAND