Nudge Region/Event Position Left by 5 SMPTE Frames
Move the region or event 5 SMPTE frames earlier in the timeline. Warren Huart might say “forward” — make the sound happen sooner.
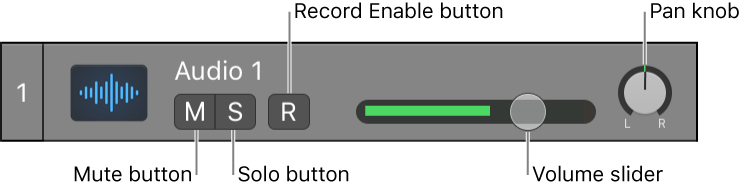
Move regions in the Logic Pro Tracks area — Apple Support
You can nudge regions (move them in small increments) left or right using key commands. To nudge regions, you first set the nudge value, then move selected regions by this value. Alternatively, you can nudge regions by a set value.